Mama’s Fridge Pickles

This year, I grew my cucumbers vertically. The result was that they have been able to protect themselves from the Sacramento heat and will not stop producing. It’s been the summer of Mama’s Fridge Pickles!
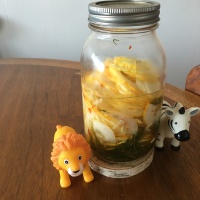
img_6794

This is my personal recipe that I’ve tailored from a few trial and error attempts with multiple recipes. I love it because the cucumbers are jared in less than 15 minutes and the pickles are ready after 6 hours! They only keep for 6 weeks in the refrigerator, so make a note on the jar.

Here is what you will need:
4-6 cucumbers (I used 4 lemon cucumbers for this)
1/2 cup white vinegar
3 tsp Kosher Salt
3 springs fresh dill
1 smooshed garlic clove
1 tsp red pepper flakes (or a leftover pack from the pizza place)
1 quart Mason Jar
Mandoline (optional)

If you gather all you need first, this will go very quickly. If you have impatient kids who want to help, this is a bonus step.

First, wash and slice your cucumbers. I use a Mandoline because it’s fast and consistent. I do not recommend this as a kid job. It’s definitely a grown person job (for fingers sake). The goal is to have enough slices to reach the top of the mason jar.

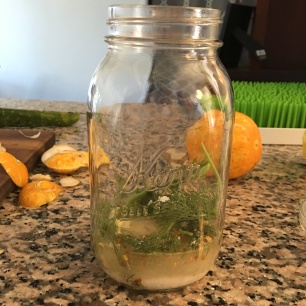
Speaking of your mason jar, take two or three stalks of dill (or half of a dill package from the store) and cut off the stalk leaving the beautiful leafy part. Discard the stalk. Give the dill a little squeeze with your hands and place them in the bottom of your mason jar.

Smash a clove of garlic and drop it in.

Toss in your salt. Throw in your vinegar. Sprinkle in your pepper flakes. Tighten the lid back onto the jar and give that mason a good shimmy shake for about a minute.

Here is where you have to trust me. You will look at this mixture and then look at the cucumbers and want to shake your head. It’s going to be okay. Science is going to do the rest of the job and we just get to observe.

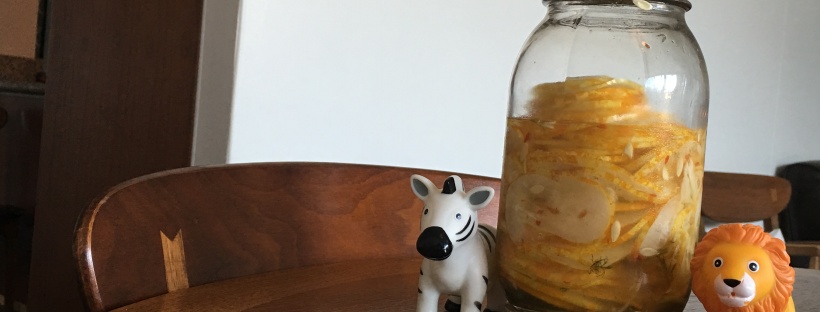
Place your cucumbers in the jar in the mixture. Some of you are great at making things pretty. I applaud you. Although this is a present for my friend Brit (you can see her art here), this is about as adorable as I can get. You do you. I’ll be me. It all tastes the same in the end.

After I fill it all the way up with the cucumbers, I tighten the lid back on. I flip it over one time to let all the liquid come to the top, just for a moment, then flip it back right-side up. Then I pop it in the refrigerator.

It only needs 6 hours. Come back to it. Flip it again if you want to, although you don’t have to. I often can’t resist the urge. The longer you let it sit, the more your stack will shrink.

In the end, your jar will probably be only three quarters full of pickles. This is a good thing!

img_6793

Don’t forget to add the expiration date and enjoy!

Written by Mariah Cook, Sacramento local and toddler mom with another baby on the way (any day). Pregnancy brain motivated her to write her recipe down somewhere otherwise it would be lost for good.


Too Many Tomatoes? Dry them! Sun-Dried Tomatoes!

The end of summer is near. For me, this means two things. Kids are heading back to school and I have way too many tomatoes in the garden for my family to eat. Let’s focus on those tomatoes for a second. As much as I love having my family and friends over to have their own harvests, I want to preserve as many as possible for the winter. At the same time, I don’t have time.  I also want my kid to be able to help me, or at least pretend to help, long enough for me to accomplish my task.
That’s why we are making sun-dried tomatoes.

For this task, you will need a food dehydrator or access to a friend’s. Yes, you could use your oven; however, with the summer heat outside, the less I need to use my oven the better. If you have a garden or you can’t beat the deals you are seeing at your local farmer’s market, buying a dehydrator might be a great investment.

NESCO is what I have - it's on the low end but works great

NESCO is what I have – it’s on the low end but works great

Things You Need:
Tomatoes (I use Roma, Ace, and San Marzanos. Smaller sizes shrink too much. The bigger the better.)
A paring knife (To be used by a grown-up.)
Little thumbs (Kid fingers happen to be the perfect size.)
Kosher salt
Basil (Just another fun way to use your dehydrator if you are feeling inspired.)

Preparing Your Tomatoes:
I like to rinse my tomatoes in a colander and leave it in the sink to air dry while I work. I slice my tomatoes in half and get the seeds out using my thumbs. I do this over the sink as well.  If the tomato is too large for the dehydrator at this point, I slice the tomato lengthwise, about ½ inch thick. You want a big slab, but you also need to be able to stack your racks. This will help you keep your slices or halves pretty consistent in size as well.

I simply place the slices on the rack, sprinkle with salt and basil, then stack the rack!

work station

work station

single layer, sprinkled with salt and basil, ready to go

single layer, sprinkled with salt and basil, ready to go

Culinary Note: Many recipes recommend boiling your tomatoes first before slicing and seeding. This isn’t mandatory, but a matter of taste. I don’t have time to boil, cool, and peel a hot tomato. Just placing them on the rack with the skin on is enough for my family and they taste great.

Drying:
ust like you and I, dehydrators are all different, so read your manufacturer’s manual for their recommended dry time. I dry mine for about 10-14 hours. It’s like a crockpot, right?! You just get it ready and leave it be.

The key is to check after the minimum time. You want a tomato that is like dried leather versus a crunchy dead leaf.

finished and ready to freeze

finished and ready to freeze

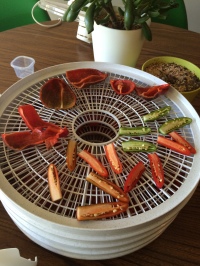
Culinary Tip: If you have a lot of hot Serrano or Poblano peppers, you can cut them in half and dry them on a separate rack. They use the same amount of time to dry! You store them the same way as the tomatoes.

serrano peppers and pablanos

serrano peppers and pablanos

Storage:
Dried tomatoes need to be in an airtight environment like a ziploc bag and placed in the freezer.

get all the air out and they are ready to freeze

get all the air out and they are ready to freeze

Questions About Storing Dried Tomatoes in Oil:
Can you do it? Sorta. You can soak them in oil with a sprig of any herb for up to 24hrs in a closed container like a mason jar. I have not found a safe way to can dried tomatoes in oil in a home kitchen for long-term storage. If you have, leave me a comment! I’d love to know!

Ideas for Use:
Aside from the common stuff like pizza, sauces, and salads, you can use them as part of a gift basket for holidays and/or birthdays! People love things made from the heart-I know I do.

Written by Mariah Cook. She lives in Sacramento with her small son and big husband.

Mason Jar Terrarium. Make it. Love it. Watch it Grow!

Nothing says, “Mini Garden,” quite like a terrarium. Terrariums are a great gift and fun craft to make with kids. Personally, watching them grow is an equally magical part of having one as each plant grows differently in whatever container you use. Succulents are a favorite these days because they are low maintenance and require very little water, which is a good thing because water is pretty rare these days in lovely Sacramento, California. Here is my step-by-step succulent terrarium using a mason jar, plants from my own garden, and tools from my kitchen.

What You Need:
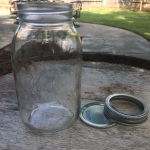
Mason jar
Tiny succulents
Tiny helper hand (optional)
Potting soil (you gan get at Dollar Tree)
Small rocks (Dollar Tree)
Floral moss (Dollar Tree)
Chop stick
Tweezers
Toothpick
Spoon
Spray bottle with water
Miniature action figure (optional)

IMG_3240 IMG_3264 IMG_3242 IMG_3243 IMG_3244 IMG_3248 IMG_3260

One thing to note about terrariums is that they need drainage to prevent the roots of the plants from rotting.  There will come a day when you over-water this by accident. Drainage will give you the grace you need. It also gives you the opportunity to create great layers of colors in your jar. I am creating a jungle theme with this one, so I chose earth tones.

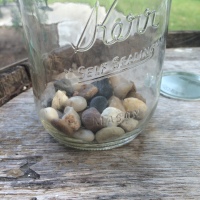
First, place a layer of small rocks at the base of your jar. You can choose any color rock you want! I went with river rock colors. At minimum, make sure your layer of rock covers the entire surface of the bottom of the container. The more rocks you add beyond that will add height to the overall garden inside.

IMG_3245

Then, add a layer of moss. Moss comes in all sorts of fun colors too! The purpose of the moss is to create a barrier between the soil and the rocks. If your moss is dry, you can lightly mist it with a spray bottle to get it to pack down. If you want a thin layer of moss, be sure the layer is still dense enough to prevent soil from slipping down into the rocks. This will create the drainage for your garden and add a layered look.

IMG_3246

Take a moment to choose your mini plants.  I have a small succulent garden that is slowly growing already. I decided to just pick a few of my own guys. The key: The smaller the better because it will GROW over time. I chose a small Hen and Chicks and a couple types of Sedum.

IMG_3251  IMG_3253

No need to get crazy on a million plants. If the terrarium looks a little sparse don’t panic. Plan based the fact that they will grow.

Put in a layer of soil in your jar. You can spritz the dirt to moisten if it seems too dry. You only need enough soil to cover the roots of the plants, but added soil will lift your garden higher. Maybe you like that. Do what you want! You can spoon in extra soil as needed once you have them in place. I use long tweezers, a chopstick, and a toothpick to get the job done. This is the hardest part, but is fun. Tiny kid hands work great too. If you have a plant that seems to lean to one side and you can’t get it placed ‘just right,’ you can use a rock to aid in your efforts.

IMG_3254  IMG_3256  IMG_3259

Add decoration like small rocks, sand, twigs, or miniature fun stuff. I chose rocks, an army man, and a small can of beer (don’t judge me).

IMG_3261

Spray down the inside of the jar to rid the sides of dirt, clean the plants, and moisten the soil. Then use a tissue to, ever so GENTLY, wipe down the inside of the terrarium.

IMG_3262  IMG_3265

For a mason jar, put the rim on the jar but not the lid portion. You do not want to cover the top of this container or it will mold and die. I tied some kitchen twine at the top too! Cute, but not obnoxious.

IMG_3267  IMG_3268  IMG_3269

Enjoy! With Father’s Day around the corner, this might be right up your ally! These do great in offices, in kitchens, in kid’s rooms, and you only need to lightly water them when you actually remember. And let’s face it, as parents, there is no way we will remember. But hey, your kid(s) might remind you.

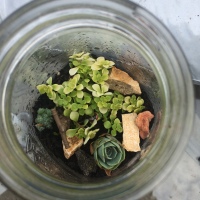
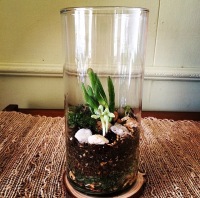
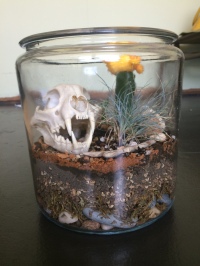
Here are a few other terrariums I have done in the past to help inspire you:

FullSizeRender (1) FullSizeRender

IMG_2982IMG_2983

Here are some links to a few great terrarium books I use as references:
Tiny World Terrariums
Terrariums Reimagined
Succulents Simplified: Growing, Designing, and Crafting With 100 Easy-Care Varieties

Written by Mariah Cook. She and her husband live in Sacramento with their one minion.