Unicorn Pancakes

I have one kid who will eat anything and another who won’t. What’s a mom to do but find a way to secretly sneak healthy food into something they both love; pancakes. It’s pink, it’s sweet, it’s got a great ratio of carbs, protein, and fiber. Am I also right when I say that kids will eat anything if you call it a unicorn?

Fresh from the griddle, my boys just grab and go. They jam them down without any butter or syrup!

So many of my friends have asked for this tasty stealthy recipe. Technically it’s a two-for-one post here because I will give you “Mama’s Pancake Mix,” which I always keep on hand. I’ll give you the recipe for making a classic buttermilk pancake with the mix. Then I will give you the alteration make it a UNICORN!

Side note, I use organic ingredients because I am paranoid about pesticides and wheat. Can I just say, if you make this mix the organic way,  the 5lb bag of organic flour will cost you as much as one of the organic mixes in the store. If you make the mix, you save so much casholla. Don’t feel any mom-guilt either way!

MAMA’s PANCAKE (dry) MIX (give credit where it’s due, Alton Brown, we love you)

  • 6 cups all-purpose organic flour
  • 1 1/2 teaspoons baking soda (check expiration date first)
  • 3 teaspoons baking powder
  • 1 tablespoon kosher salt
  • 2 tablespoons organic sugar

The wet ingredients for when you are ready to make a Buttermilk Pancake

  • 2 eggs, separated
  • 2 cups buttermilk
  • 4 tablespoons melted butter at room temperature

The wet ingredients for when you are ready to make a Unicorn Pancake instead!

  • 2 eggs, separated
  • 1 cup whole milk
  • 1 cup full-fat original Greek yogurt
  • 4 tablespoons melted butter at room temperature
  • 1 4oz  beet/mix baby food
  • 1-2 tsp chia seeds (or ground flax if you want)

UNICORNS! UNICORNS! UNICORNS! (chanting)

Directions (makes 20 pancakes)

Grab three bowls; two large mixing bowls and one smaller one. Also grab a whisk.

In the small bowl, melt the butter and set aside for a quick minute. TIP: I use a silicone bowl.

In a large mixing bowl, add 2 cups Mama’s Pancake Mix. Set aside.

In the other large mixing bowl, add the milk, yogurt and baby food. Mix well. Add egg whites and mix well. Add chia seeds and mix well. Set aside.

IMG_3283

To the bowl of butter, add your egg yolks and mix well. Add them to the large wet ingredient bowl and mix.

IMG_3284

Mix yokes with the melted butter

Add the wet to the dry and mix together until combined. It can be a little lumpy. If you feel like it’s too thick, add one tbsp of milk at a time.

Kid anticipation

Child anticipating pink unicorn pancakes

Set it aside for another quick minute.


Heat up your skillet. I like using the electric version and set it for 325 degrees.

Once it’s reached temp, you will see that your pancake mix is much more fluffy! Use a ice cream scooper to dollop onto the skillet. Cook like a traditional pancake; about 2 minutes each side.

TIP:  Freeze what’s left after the savages have eaten their share. Unicorns for days, literally.


Advertisement

Mama’s Fridge Pickles

This year, I grew my cucumbers vertically. The result was that they have been able to protect themselves from the Sacramento heat and will not stop producing. It’s been the summer of Mama’s Fridge Pickles!

img_6794

This is my personal recipe that I’ve tailored from a few trial and error attempts with multiple recipes. I love it because the cucumbers are jared in less than 15 minutes and the pickles are ready after 6 hours! They only keep for 6 weeks in the refrigerator, so make a note on the jar.

Here is what you will need:
4-6 cucumbers (I used 4 lemon cucumbers for this)
1/2 cup white vinegar
3 tsp Kosher Salt
3 springs fresh dill
1 smooshed garlic clove
1 tsp red pepper flakes (or a leftover pack from the pizza place)
1 quart Mason Jar
Mandoline (optional)

If you gather all you need first, this will go very quickly. If you have impatient kids who want to help, this is a bonus step.

First, wash and slice your cucumbers. I use a Mandoline because it’s fast and consistent. I do not recommend this as a kid job. It’s definitely a grown person job (for fingers sake). The goal is to have enough slices to reach the top of the mason jar.

Speaking of your mason jar, take two or three stalks of dill (or half of a dill package from the store) and cut off the stalk leaving the beautiful leafy part. Discard the stalk. Give the dill a little squeeze with your hands and place them in the bottom of your mason jar.

Smash a clove of garlic and drop it in.

Toss in your salt. Throw in your vinegar. Sprinkle in your pepper flakes. Tighten the lid back onto the jar and give that mason a good shimmy shake for about a minute.

Here is where you have to trust me. You will look at this mixture and then look at the cucumbers and want to shake your head. It’s going to be okay. Science is going to do the rest of the job and we just get to observe.

Place your cucumbers in the jar in the mixture. Some of you are great at making things pretty. I applaud you. Although this is a present for my friend Brit (you can see her art here), this is about as adorable as I can get. You do you. I’ll be me. It all tastes the same in the end.

After I fill it all the way up with the cucumbers, I tighten the lid back on. I flip it over one time to let all the liquid come to the top, just for a moment, then flip it back right-side up. Then I pop it in the refrigerator.

It only needs 6 hours. Come back to it. Flip it again if you want to, although you don’t have to. I often can’t resist the urge. The longer you let it sit, the more your stack will shrink.

In the end, your jar will probably be only three quarters full of pickles. This is a good thing!

img_6793

Don’t forget to add the expiration date and enjoy!

Written by Mariah Cook, Sacramento local and toddler mom with another baby on the way (any day). Pregnancy brain motivated her to write her recipe down somewhere otherwise it would be lost for good.


DIY Infused Local Honey

Ever thought of making your own line of honey without becoming a beekeeper? Need a project to do with school-aged kids while making gifts for friends this season? Today is your day!

This year, I decided to infuse Sacramento honey with garden herbs! To gift 12 special people in my life, I spent about $2.50 a person.

Here is what you will need:

  • 5 days lead time
  • Honey (I got 5 lbs because I wanted extra, talk to the honey people)
  • 12- 4oz mason jars
  • Dried Herb – choose one herb type per jar. If possible, dry the herb on the stem
  • Large soup pot
  • Tea kettle

First, stop by Sacramento’s famous Sacramento Beekeeping Store, located near X & 21st Street. Did you know they have a tasting area? For real though! You can taste all sorts of local honey and decide which one would go best with the herb of your choice. Also, they can help you calculate how much honey you will need. Why is that important? Because honey is very dense and is measured by weight verses ounces. For a 4oz jar you need 5oz honey. Honestly, my brain cannot even handle the calculations and lucky for me the beekeepers are there to help.

IMG_4767

When you see this, you’ve come to the right place! My kid is cute, right?!

IMG_4769

Tasting area! All were delish!

IMG_4771

Sacramento Wildflower honey has a strong and wonderful taste.

IMG_4770

I chose Delta Wildflowers! It’s more mellow. Who knew?!

Okay, a note about your dried herbs. The jar will look cuter when the herb is dried on the stem. A trimming of rosemary or mint can be dried upside down in a paper bag. You can also use a dehydrator but be careful with your delicate babies.  The key is to have completely dried herbs that are fresh (if not dried all the way, they will mold).

I wanted to use lavender but quickly learned a couple facts from reading up on it. First, only English Lavender is edible. That’s important, right? Second, only the flowers have enough flavor to infuse. My plants at home are not in season so I made due with purchasing local buds from my honey friends.

IMG_4772

Local herbs and instructions. Better safe that sorry.

So you’re ready? Let’s do this!

Sanitize your mason jars and lids. I boil the pieces for about 5 minutes and then let air dry.

Put a sprig of herb in the bottom of your container or along the side. I used flower buds so I put 1/2tsp in the bottom of my jar. Meantime, warm water in your kettle until  it’s screaming. Then pour water into a soup pot. Place the honey (in the container you purchased it in) into the hot water to warm it until it’s nice and syrupy. The runnier the honey the better. Add more water as needed.

Once the honey is warmed, pour it into your jars. You will notice that the herbs want to rise to the top. That’s okay!

Close them up and store them upside down for 5 days.

IMG_4922

For flower buds, flipping them doesn’t matter; however, for sprigs it does.

All that’s left is to make them cute and give them away!

Side note, if you want to infuse more flavor than what this recipe suggests, a drop or two of edible essential oil of your herb will do the trick. Just warm the honey jar in a water bath, add and stir.

IMG_4937

My cute honey pots ready to go to their new holiday homes. I added a note stating it was Sacramento Delta Wildflowers for an “oooh-aaah”factor.

Did you know that honey never goes rancid? If it crystalizes, you can just warm it up in a water bath and it will be as good as new.

That’s about it. Have fun giving your one of a kind honey to your friends!

Written by Mariah Cook, Sacramento mom and lover of bees everywhere. After making and giving this honey, she was was asked if she has her own bee hive. She thinks the beekeepers in Sacramento are doing a mighty fine job and she will gladly support their work. 

Homemade Wooden Ornaments

If you have a miter saw and a tree branch, then I have a craft for you that goes beyond coasters (And a great project for older kids).

I started a tradition last Thanksgiving of giving my nephews and my son Christmas ornaments. This year, I wanted to also incorporate some branches I saved for crafting. I experimented with both birch and redwood for this craft. Overall, the birch was easier to work with verses the redwood, however, in the end I chose redwood primarily because I thought it was prettier.

Here’s what you need:
Miter saw (also known as a chop saw)
Drill and wood drill bit (to make hole)
Tree ranch that is consistent in size and is straight
Chalk board paint
Pencil and eraser
Ruler
Wood burning tool with ball point and calligraphy tips
Chalk pencil or permanent chalk marker ( I ended up using a metallic marker)

I chose to cut my rounds 1/2 inch thick from a branch that was about 3 inches in diameter. Just a suggestions, cut as many rounds from your branch as possible regardless of how many you will actually need. For example, I needed four rounds, but the branch I chose was long enough to make ten, so I cut all ten. This is because wood isn’t perfect and you never know what kinds of imperfections or colors you will discover once you slice into it. Afterwards, pick your favorite pieces for your project and use the rest for practicing ideas or coasters for your table (A pack of 6 makes for a great hostess gift).

IMG_4569

This piece of birch has water stains, soft spots and pink marks. Each round is one of a kind!

Drill a hole at the top of your round. Paint one side with the chalk board paint. For me, it was easier using my finger to paint because I didn’t want to get any on the bark.

IMG_4572 2.JPG

Example of a redwood round drilled and painted.

You remember those extra rounds? Ok! Bust them out to practice using that wood burner! Every piece of wood is different and you want to get the feel for what you are working with before you do your final piece. Why? Because you cannot erase burnt wood, LOL, so you have only one shot! No pressure…

I cannot free-hand anything. For real though. So I used printed images to to inspire me. Remember, these aren’t perfect circles, so centering images can be tricky. I sketched my image with a pencil so I could erase if needed and clean up when done.

After, and only after, feeling confident in practicing with the burner, I went to work. I found that the calligraphy tip worked great for straight edges and the ball point was perfect for rounded ones.

IMG_4764

Imperfect and adorable!

Then came the hand lettering on the chalk side. Again, I need ideas in front of me and to pencil out what I want to do ahead of time. I used this book:

I went over the penciled areas with a chalk pencil, but ended up using a metallic paint pen instead based on my own personal preference.

My nephews loved their gifts and I know I was happy with the one I made for my son. Mine aren’t fancy enough for etsy, but I know some of you could probably make money off your mad skills! Enjoy!

Written by Mariah Cook, AKA Auntie MoMo.

Too Many Tomatoes? Dry them! Sun-Dried Tomatoes!

The end of summer is near. For me, this means two things. Kids are heading back to school and I have way too many tomatoes in the garden for my family to eat. Let’s focus on those tomatoes for a second. As much as I love having my family and friends over to have their own harvests, I want to preserve as many as possible for the winter. At the same time, I don’t have time.  I also want my kid to be able to help me, or at least pretend to help, long enough for me to accomplish my task.

That’s why we are making sun-dried tomatoes.

For this task, you will need a food dehydrator or access to a friend’s. Yes, you could use your oven; however, with the summer heat outside, the less I need to use my oven the better. If you have a garden or you can’t beat the deals you are seeing at your local farmer’s market, buying a dehydrator might be a great investment.

NESCO is what I have - it's on the low end but works great

NESCO is what I have – it’s on the low end but works great

Things You Need:
Tomatoes (I use Roma, Ace, and San Marzanos. Smaller sizes shrink too much. The bigger the better.)
A paring knife (To be used by a grown-up.)
Little thumbs (Kid fingers happen to be the perfect size.)
Kosher salt
Basil (Just another fun way to use your dehydrator if you are feeling inspired.)

Preparing Your Tomatoes:
I like to rinse my tomatoes in a colander and leave it in the sink to air dry while I work. I slice my tomatoes in half and get the seeds out using my thumbs. I do this over the sink as well.  If the tomato is too large for the dehydrator at this point, I slice the tomato lengthwise, about ½ inch thick. You want a big slab, but you also need to be able to stack your racks. This will help you keep your slices or halves pretty consistent in size as well.

I simply place the slices on the rack, sprinkle with salt and basil, then stack the rack!

work station

work station

single layer, sprinkled with salt and basil, ready to go

single layer, sprinkled with salt and basil, ready to go

Culinary Note: Many recipes recommend boiling your tomatoes first before slicing and seeding. This isn’t mandatory, but a matter of taste. I don’t have time to boil, cool, and peel a hot tomato. Just placing them on the rack with the skin on is enough for my family and they taste great.

Drying:
ust like you and I, dehydrators are all different, so read your manufacturer’s manual for their recommended dry time. I dry mine for about 10-14 hours. It’s like a crockpot, right?! You just get it ready and leave it be.

The key is to check after the minimum time. You want a tomato that is like dried leather versus a crunchy dead leaf.

finished and ready to freeze

finished and ready to freeze

Culinary Tip: If you have a lot of hot Serrano or Poblano peppers, you can cut them in half and dry them on a separate rack. They use the same amount of time to dry! You store them the same way as the tomatoes.

serrano peppers and pablanos

serrano peppers and pablanos

Storage:
Dried tomatoes need to be in an airtight environment like a ziploc bag and placed in the freezer.

get all the air out and they are ready to freeze

get all the air out and they are ready to freeze

Questions About Storing Dried Tomatoes in Oil:
Can you do it? Sorta. You can soak them in oil with a sprig of any herb for up to 24hrs in a closed container like a mason jar. I have not found a safe way to can dried tomatoes in oil in a home kitchen for long-term storage. If you have, leave me a comment! I’d love to know!

Ideas for Use:
Aside from the common stuff like pizza, sauces, and salads, you can use them as part of a gift basket for holidays and/or birthdays! People love things made from the heart-I know I do.

Written by Mariah Cook. She lives in Sacramento with her small son and big husband.

Raising Backyard Chickens in Sacramento

Have you ever wondered how to get started raising chickens in your backyard? Rebekah Scoville and her family have their own brood in Oak Park. Below is her story. For those who are looking to do the same; you’re welcome!

In July 2013, I purchased a house that had room enough to fulfill the goal of raising backyard chickens. Two years later, I’m no expert at raising chickens but it has been quite a learning experience! Here’s my journey from idea to reality with our chicken coop in Sacramento.

Choosing Chickens
Armed with the book, A Chicken in Every Yard, I read about the different kinds of breeds and picked five different breeds with egg production and appearance as the primary criteria.  I wanted five full grown hens, but because the book suggested some chicks may not survive, we brought seven baby chicks home that day from Bradshaw Feed & Pet Supply.

Look how small they were compared to the hose nozzle.

Look how small they were compared to the hose nozzle.

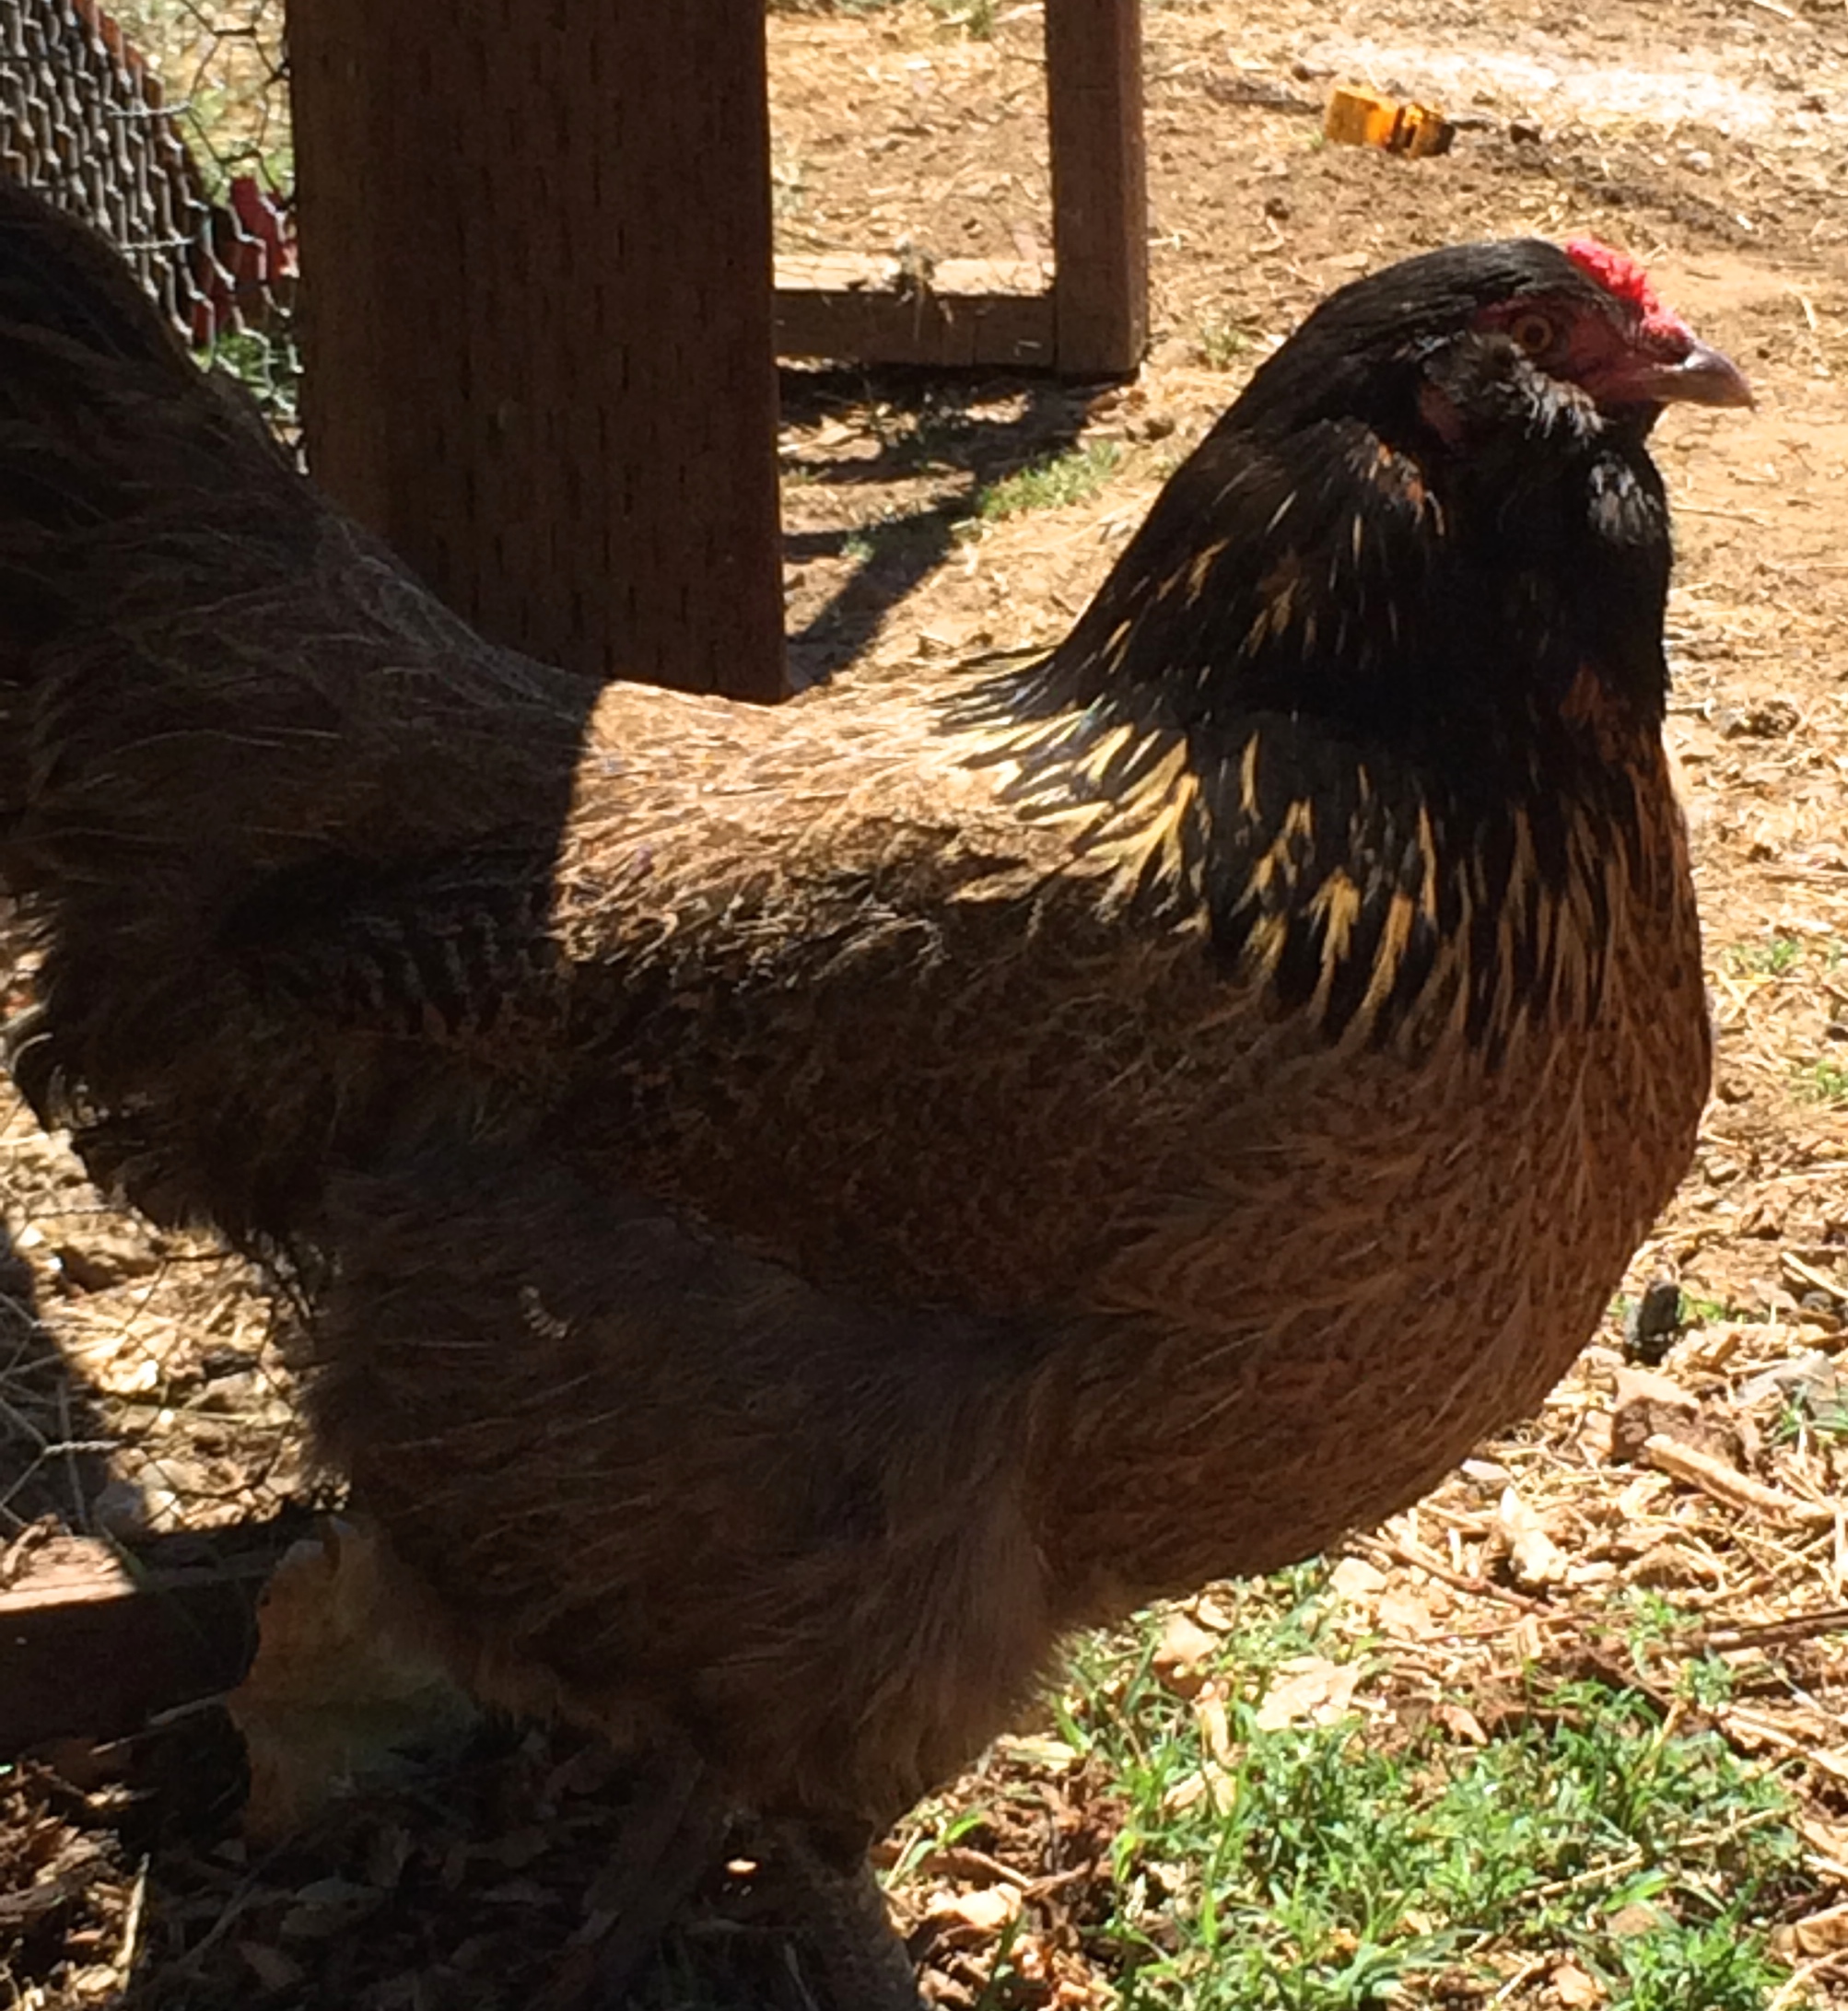
We chose a Australorp, two Rhode Island Reds, two Ameraucanas, a Plymouth Rock and a Wyandotte. I like the look of a diverse flock with different varieties of hens and this mix was just right for us.  The one regret I have is only getting two Ameraucanas.  This breed is also known as an Easter Egg chicken because they are known for laying multi-colored eggs, which I was so excited about!

This is Ethel, our one Ameraucana.

This is Ethel, our one Ameraucana.

Sadly, one of the baby Ameraucana, or Easter Egg chicks was accidentally stepped on (by a toddler) about a week after we brought it home and had to be put down. While we did have one other Ameraucana chick left, it only laid eggs the same color as my other hens.  So the next time I choose baby chicks, I will get a few more Ameraucanas, to ensure more variation in egg color.

Here is a list of the supplies we had when we brought our baby chicks home:

  • Two large cardboard boxes taped together with cedar shavings and newspaper on the bottom. Newspaper is great for quick cleaning, just pick up and replace daily.
  • Small chick feeder. 
  • Water feeder. I had a plastic one at first, but it got moldy and gross after just a short period of time.  I would encourage you to pay a little more and get a metal one.  After a year the metal one still looks great, even after being outside in the elements!
  • Heat lamp. Chicks need a lot of warmth during their early weeks of life.  About 90 degrees for the first week and then taper down five degrees each week for five to eight weeks.
  • Chicken feed for baby chicks. I buy mine at Western Feed & Pet Supply.
  • Small cardboard box for the car ride home.

Our baby chicks were kept in our over-sized laundry room for the first six weeks to keep them warm and protected during their early weeks of life.  It was the only place to have them in our house while keeping them away from our curious toddlers. They were much more dusty and stinky than I had anticipated.  Chickens love to scratch and dig, which creates a good amount of dust. I don’t mind that at all when they are outside, but I did mind the sudden layers of chicken dust inside my house. The next time I have chicks, I am going to find a different place to house them for those initial six weeks while they are too delicate and small to fend for themselves outside.  The fun part of this period is that they are so tiny and cute!

The Coop and Run
We have a very basic, functional chicken run and coop set-up.  As you can see from the picture, it is nothing fancy. We were given the coop by my aunt who also raises chickens. My husband built the chicken run around the coop.

Our home for our little lady friends

Our home for our little lady friends

Chicken Run vs. Free Range Chickens
We chose to give our hens some extra room to roam with a slightly larger run, so we made our chicken run 10’ by 10’.  A run that is 8’ by 4’ is adequate for up to eight birds if you let them roam during the day, so our run has plenty of extra run for our little ladies.  We were so excited to start raising our chickens, we brought our chicks home before the chicken run was complete.  I figured we had to keep the baby chicks inside for six weeks anyway, so that would be plenty of time to finish our run, right?  Well, finishing the run took longer than planned (like everything, right?). My advice is to have your chicken run and coop space completely finished before buying your chicks.  Our run was still incomplete when the chicks became too large to keep in the house.  So for the first few months, they truly had free range of our entire backyard.  I liked this idea in theory; chickens roaming around happily eating the worms and bugs and producing eggs to their hearts content.  Though in reality, our backyard was completely covered in chicken poop within a few days.  Not just on the ground, but on the patio table, chairs, walkway, hose, outdoor mat, kids toys…anything and everything we had in our backyard, a chicken would poop on it.  It got to the point that I didn’t like to go into our backyard, let alone let the kids play back there because the poop was everywhere.  When we finally completed the chicken run, we put the chickens in their new home and thought we had solved the poop problem.  However, a new problem arose when in less than an hour of being in the completed chicken run, the chickens flew over our six-foot-high fence and were back to being queens of the yard. My father-in-law helped by clipping their wings so they couldn’t fly over (no chickens were harmed here and clipping wings is painless). Yet even with clipped wings, they still managed to escape. We ended up having to put chicken wire on top of the whole run. Doing that solved the problem. There was no more escaping and no more poop in the backyard. Finally! I do let the ladies out when we are in the backyard gardening, watering or playing.  I love letting them roam a bit, eat the bugs, scratch at the ground and have a bit of freedom. However, to help prevent the previous poop problem, my husband made me promise to put them right back in the coop when we go inside.

TIP: The best way I have found to wrangle chickens back into their coop is by squirting them with the hose. They hate getting wet so they run from it and I can get them to go in whichever direction I want.

Daily Maintenance
People ask me all the time if chickens are a lot of work, but in my opinion chickens are the easiest animals to own, even at this time in my life with two small children. Daily chicken maintenance takes about five minutes.  I go out with my bowl of food scraps, throw the ladies the scraps and some chicken feed on the ground of their run, change out their water, grab the eggs and I’m done.

The ladies loving the cantaloupe and other produce scraps.

The ladies loving the cantaloupe and other produce scraps.

Each month, I put new cedar shavings in the coop where they lay their eggs.  My hens insist on roosting at night on top of their coop, so I never have to clean out the inside of their coop because they don’t poop in there.  Whenever I have the time, I spray down the roof of the coop with the hose to clean off the poop that accumulates on top.  That’s all I do for them.  Like I said earlier, we let them out to roam sometimes and interact with them when we have the desire. I love that I can give them extra attention when I have time, but when days are busy, it’s a five-minute chore that rewards us with yummy, fresh eggs.  It’s a win in my book!

Pros of Backyard Chickens
I love having my hens in our backyard.  During the summer we get about five eggs a day from our six ladies. During the winter months when there is less daylight, their egg laying is reduced by about half.

These are the eggs I collected yesterday. Two days worth of egg production in the summer.

These are the eggs I collected yesterday. Two days worth of egg production in the summer.

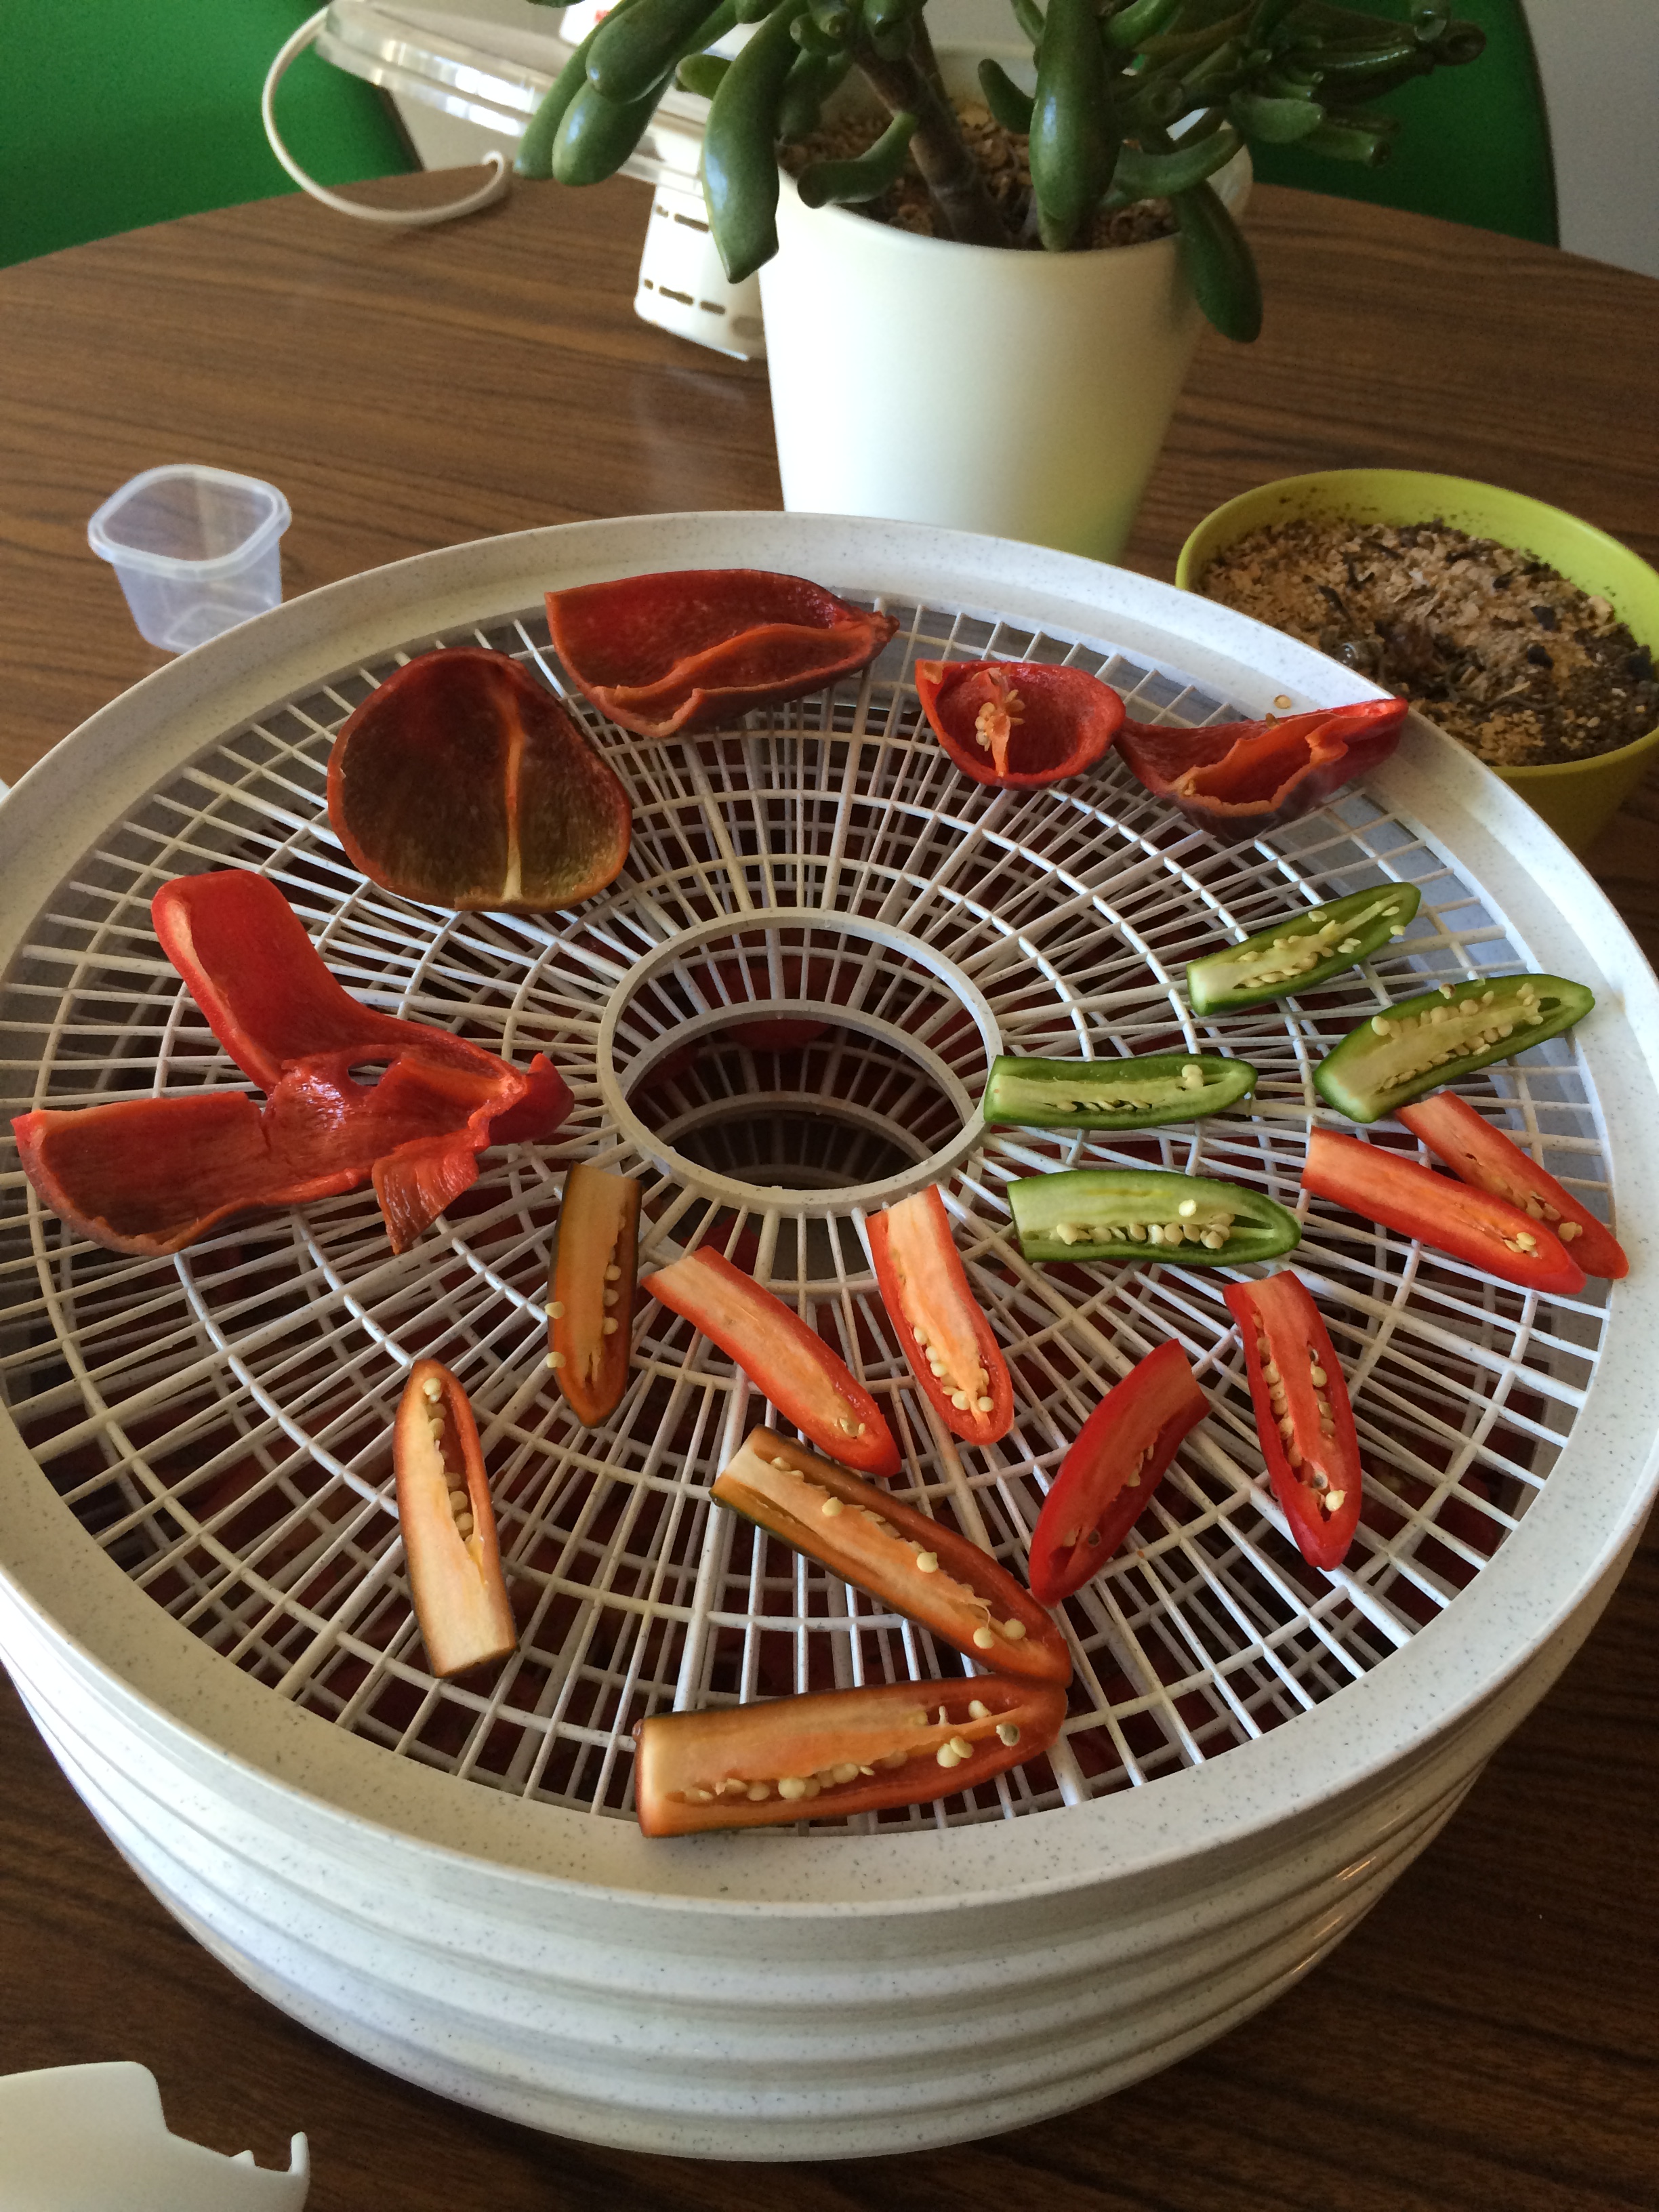
I love being able to feed my family fresh eggs that were laid that day or just a day or two before. We are spoiled and rarely eat store bought eggs anymore. The other thing I love is that feeding the chickens eliminates our need to compost fruit and vegetable waste.  We give all of our fruit and vegetable scraps to our chickens and they love it! They eat a variety of produce with the exception of citrus. We even put our grass clippings in the coop as well. We don’t put any chemicals on our lawn, so it is safe to feed our chickens. I never have to feel guilty about not eating mushy grapes or when my kids only eat half of their bananas. We give it straight to the hens and they are much healthier and happier for it. Another small pro is the joy I get from looking out the back window and seeing my hens walking around. Observing them has a calming and relaxing effect on me.

Cons of Backyard Chickens
The cons are so small in comparison to the benefits, but I do think our coop is a bit of an eye-sore at times. We are in the middle of re-doing our backyard and one of my next projects is planting vegetation around the run to make it not stick out as much.  In the summer there are a lot of flies around the coop too.  Of course the chickens are a bit smelly too, but I don’t notice it until I am close to the chicken run. Our coop is on the back side of our property away from the house and I am thankful we chose to put it there.

Areas of Improvement
One of my goals is to plant more food in my garden next year so that I can decrease my feed costs. I like the idea of them eating more fresh produce and less processed feed.  Healthier hens produce healthier eggs and in turn, a healthier family.

Thanks so much for letting me share our backyard chicken story with you!  If you have any questions, please feel free to email me at rebekah@beersinsac.com.

Written by Rebekah Scoville who lives in Sacramento with her husband Scott (Sacramento beer enthusiast – check out their family business beersinsac.com) and two young sons.

Creative Inspiration: Please Do Not Knock

I hope this gives you a creative muse for your home! Hey, isn’t that why we flock to Pintrest? I have had a lot of requests from you, and I hear you loud and clear! You want one of these. Here is the back story on this gem of a sign. Ordering information is at the bottom of this article if you want to skip to the nitty gritty.

I am a podcast-aholic. I love hearing people’s stories and my sister turned me on to The Longest Shortest Time; all about being a parent. Moms and dads are heroes! They have a FB forum for the mamas and I am one of 10K. These people have been my companions on some crazy long nights with my little sleep-fighting monster.

Yesterday this picture was posted:
baby2

Moms got excited. Then came a knock-off:
baby3

Then came another inspired piece:
baby1

Then I had to post the original pic on my personal page because it was genius. I wish I could have a sign like this. My chihuahua and child are in cahoots to make sure all sleep around here stops, but we all know Mama always wins. Well, mostly wins.

Then came a gift from one of my dear friends:
image1 (1)

I hope you are inspired to have fun telling people to shut-it in adorable ways.I mean, how many creative ideas do you have brewing for your own sign right now? A few, right?! You could paint wood with chalkboard paint and do it up.

BUT, if you are like me and you don’t make cute things very well and would rather just buy it, the link is below.

Mrs. Darby Gates was once a Sacramento mom, but now lives in the great Salt Lake City, UT. She will always be Sacramento at heart. Her and her hubs make all sorts of stuff from reclaimed wood. This particular sign is only $25 (plus shipping). You want to customize it? She will do that for you! You need a cupcake recipe? She has tons. She is mom you want to be connected with. Enjoy!

Written by Mariah Cook. Her and her husband live in Sacramento with their son who happens to have a wicked cold and needs some serious sleep. So don’t knock, just come in.

Trendy Wall Art You Can Repurpose Later

Trendy Wall Art

I originally started this idea for my cousin’s bridal shower. The theme we decided on was a black and white striped print with accents of pink flowers and gold glitter. I wanted to do a few wall decorations for the shower that matched the theme and would give the room a little sparkle. I’m all about finding a bargain. I have champagne dreams with an apple cider budget. So, I searched for the cheapest prices I could find.

I started to keep my eyes open for small deals and I just so happened to go to Michael’s one day and found a pretty nice sized canvas that was 50% off. I believe it was about 7 bucks! I also picked up some painters tape, a tube of black acrylic paint and a few shades of pink flowers that were also 50% off. Score!

ricketa1  ricketa2    ricketa3

After about 2 weeks, I finally found a small pocket of time to start this project. I started by taping off the stripes on my canvas. I originally began to spray paint the black stripes but I didn’t like the way it was looking so I went ahead and painted the black stripes. While it dried, I hot glued the first pink flowers down.

ricketa4

I slowly pulled off the tape after it dried and Voila! 

ricketax

I glued the second set of pink flowers on the canvas.

ricketay

I was torn about exactly what I wanted to do in the middle. I knew I wanted “LOVE” to be represented but I didn’t know if I wanted the word or a symbol. So, I prepared for both.

I found these letters at Michael’s for $1.49 each. I also found a wooden heart for $3.00 in the clearance section. I picked up some gold glitter, Mod Podge and one of those spongy brushes.

ricketa6 ricketa7

I spray painted the letters and the wooden heart with Rust-oleum Metallic Finish gold spray paint first.

ricketa9 ricketa8 ricketa10

I allowed the pieces to dry and then I prepped my wooden heart for the sparkle! I coated it with Mod Podge and then immediately covered it in glitter.

ricketa11ricketa12

After all the pieces dried, I placed them on the canvas using glue dots. I used glue dots because I’m afraid of commitment. Not really! I loved the stripes so much that I thought I might want to use the background for different seasons. Now, I can just pop off the letters and the heart and replace them with something else. How cool!? 

Trendy Wall Art

Written by Ricketa Bluford. She lives in Sacramento and is married to Sacramento local musician, Kenny, and their three kid (all under 3yrs).

Modern Baby Gate DIY


Sacramento is home to some unique neighborhoods, each with distinct architectural styles. We live in one of the Mid-Century Modern clusters in South Land Park. What is interesting about our home is that it is an Eichler and that it has a second story addition. Once my child found those stairs leading up to the second story, it became imperative that we put up a gate at the top and bottom of the stairs. As a Mid-Century home owner, we were determined to have a gate that was both functional and complimented the era of our home.

We searched for a modern, but simple baby gate online and couldn’t find one that fit our needs. Most gates are in a doorway, which is easier for installation because you can fasten your latch on the other side. Most DIYers with the same issue chose to mount a 2×4 to the wall and then add an exterior gate latch you’d see on a fence; an ugly but convenient choice.

We were not working with a doorway, but a hallway at the top of the stairs so making a custom gate was the best choice over all. For the top we chose to make a horizontal slat gate, but for the bottom of the stairs we bought this bad boy due to space issues.

      IMG_3179     IMG_3173
For the slat gate:
MATERIALS
6 – 1×2 Pine (http://www.homedepot.com/s/1×2?NCNI-5) Note: could have bought less if we got longer than 8′ 1x2s
Spackle
EQUPMENT 
Chop saw
Brad nailer and nails
Screw gun
Putty knife
Paint w/ primer – Benjamin Moore – Revere Pewter (HC-172)
Paint Brush
WHAT WE DID:
First we measured the space. That’s always a good way to start, right? We knew the slats would need to extend to the edge of the frame of the gate. This meant that building our frame would be our first step.
Some considerations had to be made:
  • How high do I want this gate to be in comparison to the kid’s current size and how big he will grow before the gate is no longer needed?
  • How many slats do you want? We wanted 1 inch between each slat and allowed that to dictate how the height.
  • How high off the floor should the gate sit since it needs to swing open? Is it small enough to prohibit a head or foot from getting stuck? We determined 1 1/2 inch was the the best for us. Your measurements may vary.
Start by determining the best vertical height of the frame for your gate. Cut those two pieces and lay them on a sturdy work surface. The horizontal top and bottom of the frame need to be the exact length of your gate. These horizontal pieces need to extend to the far edge of the vertical part of the frame.
Determine the length horizontally as well. We made sure there was a 1/2″ gap on either side of the gate to allow for the hinges and for the swing. We didn’t want the gate to scrape against the wall when closing or opening. We also took into account our baseboards. Ours are thin, but your measurement may be different if you have thicker styles.
To assemble the frame, use a square (measuring tool) to ensure a perfect 90 degree angle and then clamp before nailing.
IMG_3185      IMG_3184
Each horizontal slat will be the same length as the top and bottom slat. Once you have made your frame, take it to the spot you want it installed and test it. Is it a good size? Yes? Then you are ready to install the rest of the slats. Again, the distance between your slats is determined by how tall your gate is and how much distance between each slat prohibits little hands from getting stuck and how many slats you want to put on there for your personal taste. We decided on 1 inch spacing between each slat.
 IMG_3113
We then cut our slats. As stated, we made them long enough to meet the outside edges of the frame so we could make sure we nailed them securely into the frame. We used a square and clamps each time.
 IMG_3114
We lightly sanded the wood to make it splinter free and to slightly round the corner, AKA kid friendly. Then we spackled the nail areas to cover and create a smooth surface before painting. After that, we lightly sanded after spackling and again to remove any high spots after painting.
 IMG_3111 IMG_3182
We added the surface bolt on the outside so our child couldn’t open, shut easily or just Eff with it, in general.
 IMG_3175
Originally we wanted to stain the gate to add a rustic feel and to offset the clean open space to match our black walnut wet bar counter top. However, pine is a soft wood and after seeing a sample stained, we decided we either needed to build the baby gate out of black walnut or paint it instead to match our walls. Our cheap asses chose the latter.
Lastly, we added a magnet latch for when we want it open, but not dangling away from the wall.
IMG_3176 IMG_3177
Written by Mariah Cook. She is happily married in Sacramento and has one little monster.

Quinoa Baby Cereal

As a mother of a 1 year old, and in the full swing of solid foods, if there was one thing I wish was easier to find on the internet when my son was 6 months old it has to be quinoa baby cereal.

Every kid is different. All moms and dads agree on that. For my kid, rice cereal and oatmeal gave my son a devilish combination of gas and constipation. Yuck and ouch! I was desperate to find a recipe for a cereal that would change everything. I needed protein, fiber, and carbs. Quinoa was the golden ticket.

What you need:

1/4 c. Quinoa; dry

I get this giant bag at Costco! The price is right!

I get this giant bag at Costco! The price is right!

2 c . Water

Magic Bullet or food processor to grind and puree

This bad boy will multi-task all your baby food needs.

This bad boy will multi-task all your baby food needs.

Ice cube tray

I use different sized silicone ones like this. P.S. They make perfect squares for the cutest ice cubes for cocktails after this baby food phase is over and done!

I use different sized silicone ones like this. P.S. They make perfect squares for the cutest ice cubes for cocktails after this baby food phase is over and done!

Here is what you do:
Put water on stove and bring to a boil.

Put quinoa in the grinder. Grind until it is a powder (about 1 min). Add to boiling water and cover. Turn heat down to low. Walk away for 12 minutes and do some dishes because we all know they are staring at you in the sink.

After 12 minutes, remove from heat. The cereal will be goopy looking. That’s a good thing! Feed your kid a couple tbsp mixed with any type of milk he/she is consuming (breast or formula). You can also mix with fruit.

Pour extra mixture into ice tray and freeze overnight. Pop out cubes and place in an airtight container to store in your freezer for easy use. When you heat up the cubes for use, I recommend only heating for 10 seconds at a time until warmed to your standards.

Here are links to find the Bullet and the ice cube trays:
Magic Bullet Mini
Silicone Ice Trays